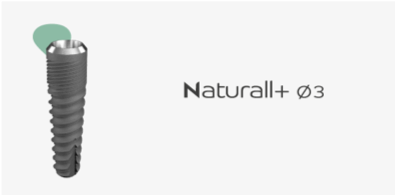
Naturall+ Ø3,
narrow dental implant
Used for single- or two-stage procedures, the Naturall+ Ø3 implant has a Morse taper style internal connection. Its narrow diameter at the apex makes this implant perfect for central or lateral incisor restorations when roots are convergent.
Indications for use
- Central or lateral incisor restorations when roots are convergent.
- Reduced mesiodistal spaces
- Fine crests
- Post-extraction surgeries
Immediate functional loading
Single and multi-unit connections with the Naturactis ø3 dental implant
Internal hexagonal conical connection
– Airtight prosthetic seal.
– Stable implant assembly and prosthetic piece.
– Precise orientation of prosthetic elements.
Same connection as the Naturall + ø3 implant
– Rationalization of the prosthetic pieces for a simpler exchange between the dental practice and laboratory.
Juxtacrestal placement
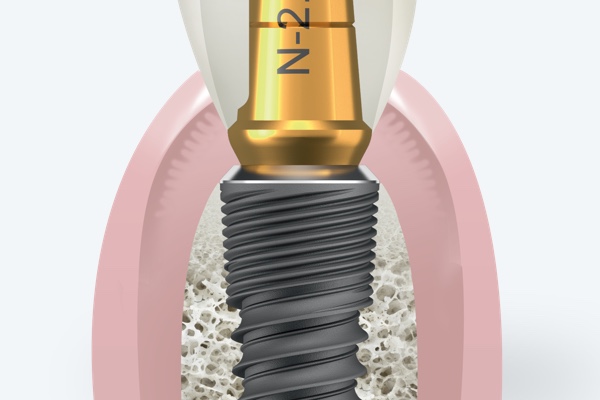
Better visibility and access to the probe.
Easier and longer-term control during the sealing process.
Micro machining grooves in the neck with an Ra of 0.2μm: the collagen fibers are oriented to better attach to the mucous.
Conical implant
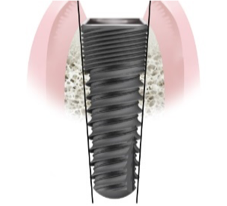
A cylindro-conical implant
– Laterally condenses the bone to increase the implant’s primary stability
Variable thread depth, larger at the apex
– Better apical anchoring in the low-density bone
Thread designed for great primary stability

Implant microthread seamlessly connects with the main thread
– Tearless insertion into the cortical bone
– Stabilized cortical bone.
– Optimization of the primary anchorage.
– Greater resistance to axial loads.
– Reduced shearing stress at the bone/implant interface.
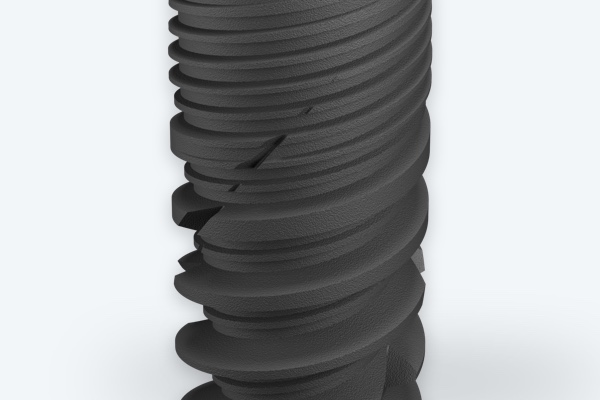
Double asymmetrical thread
– Even distribution of chewing forces
– Excellent primary stability of the implant placement
– Reduced heating of the bone and insertion time

Central protrusion between the implant threads
– 15% more surface contact with bone tissue.
– Facilitates osteogenesis
– Activates cellular reconstruction
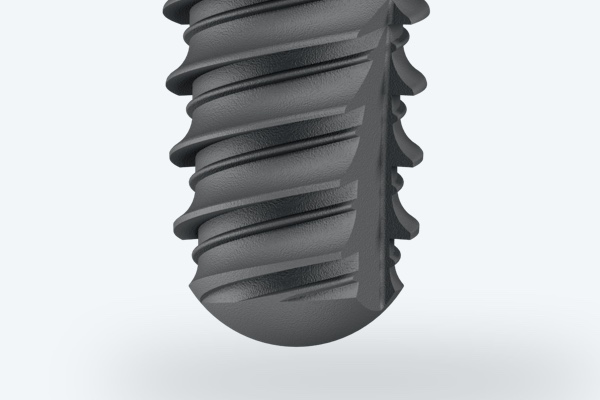
Non-traumatic and engaging apex
– Blade-shaped threads
– Larger blade depth on the apical part than on the body of the implant.
– Optimal anchorage in the spongy bone.
– High self tapping capacity.
– Perfect for post-extraction surgeries.
– Makes it easier to choose the implant axis.
STAE® tested surface quality
Titanium oxide micro-sandblasting
Acid etching with nitric and hydrofluoric acid.
27 years of clinical experience.
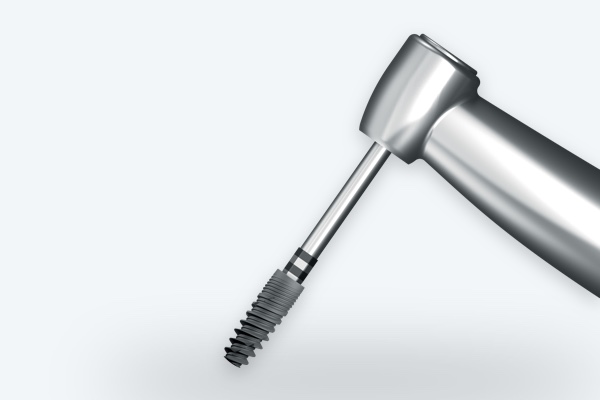
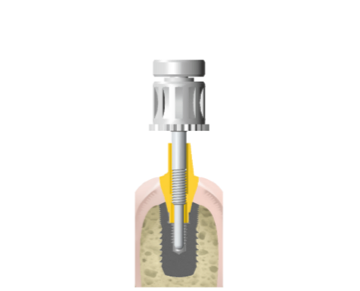
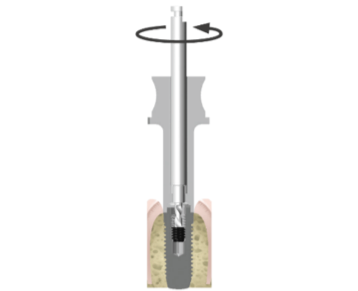
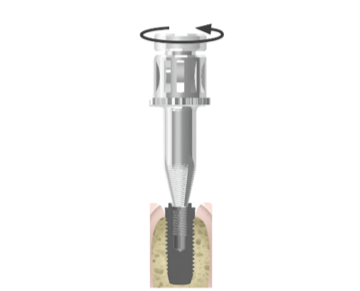
Place the implant directly in the mandrel
Save time during surgery
Better visibility when placing the implant and guiding the connection
Gingival height indicated
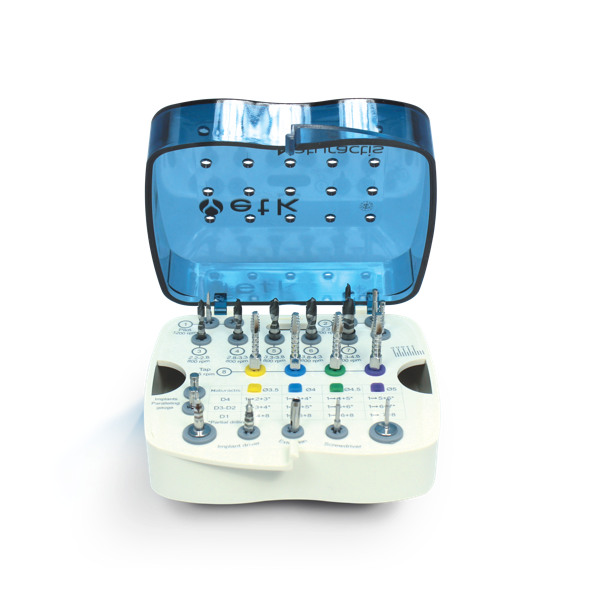
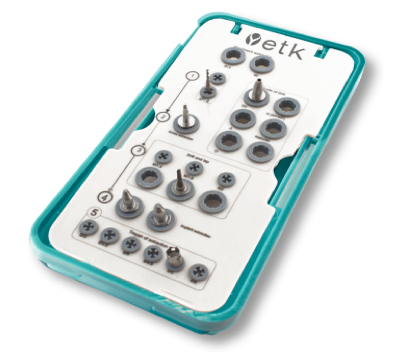
The dental implant cases
Reduced size: get more space in the sterile field and in the autoclave.
Easier drilling sequence legibility:
– the instruments are presented in order of use,
– arrow indications
– color-coded plugs, based on implant diameters.
Tiltable for better visibility of the instruments during surgery.

Standard surgical case
This case provides all the instruments needed for a surgical protocol and to manage all bone densities, for all lengths and diameters of the Naturactis ø3 and Naturall + ø3. implants.
Mini surgery kit
This simplified kit offers a selection of instruments needed to place the 6- to 14-mm long Naturall+ implants.
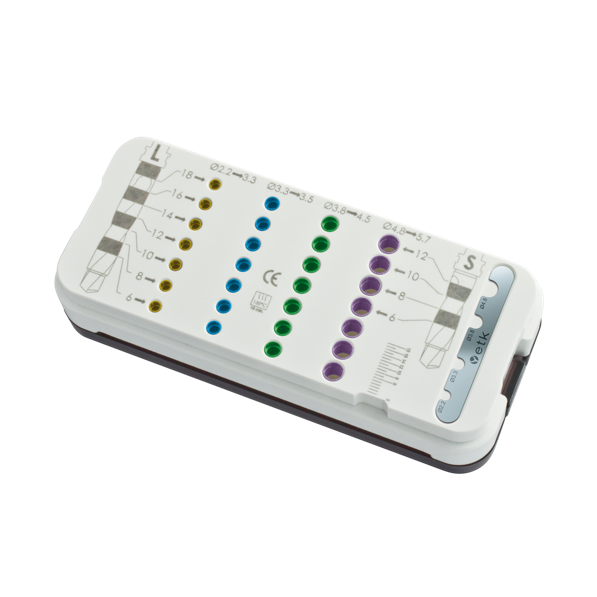
Stop kit
Universal kit: can be used with all ranges of implants (only on stepped drills).
- Pick up stops directly from a contra-angle
- Color coding makes identifying stops simple, based on the diameter of the drill used.
- 28 stops for short and long drill bits included in the case
- Can be autoclave sterilized
Extraction kit: solutions for
dental prosthetic and implant removal
- Removal of abutments stuck in the implant
- Removal of broken screws in the implant
- Removal of an implant
Extraction kits are available for all implant ranges.
1 – Removal of abutments stuck in the implant
The abutment extractor easily removes abutments without stressing the implant
2 – Removal of broken screws in the implant
A drilling guide and a carbide drill with a high-powered titanium cut creates a small opening in the remaining screw piece. You then insert a self-blocking extractor in the broken screw bit to unscrew it. You can then tap it to alter the implant thread, if it’s damaged.
3 – Removal of an implant
The implant can be unscrewed using a self-blocking extractor. The bone around the implant can be perforated using trepans adjusted to the diameter of the different implants.